
| Scanning files using the HUAWEI printer with a macOS computer |
After downloading and installing the Huawei Print client on a macOS computer, you can set up the scanning feature.
- Click the Settings icon in the Dock to open System Preferences, and choose Printers & Scanners.

- Select the corresponding HUAWEI printer from the printer list, and click Scan.
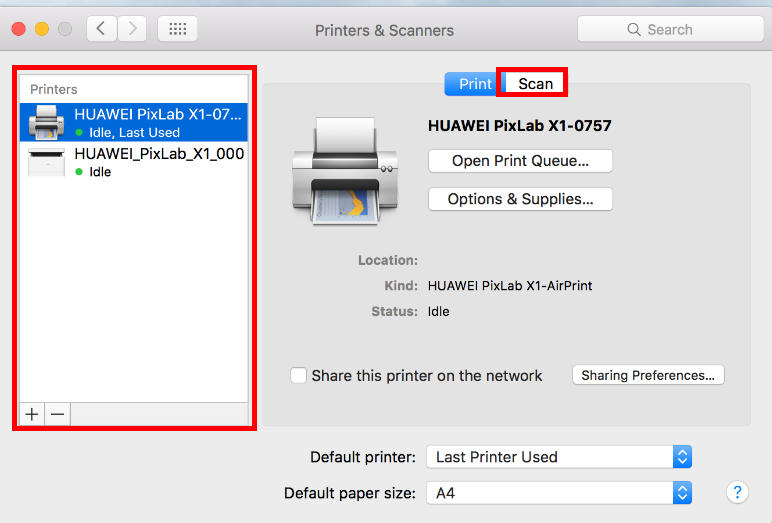

If the printer is connected through a LAN, the Scan button may be unavailable after you select the HUAWEI printer from the printer list. In this situation, click the plus icon (+) in the lower left corner of the printer list, select the Bonjour Multifunction printer in the displayed list, and click Add. The Scan button will then be displayed. Continue with the following steps.

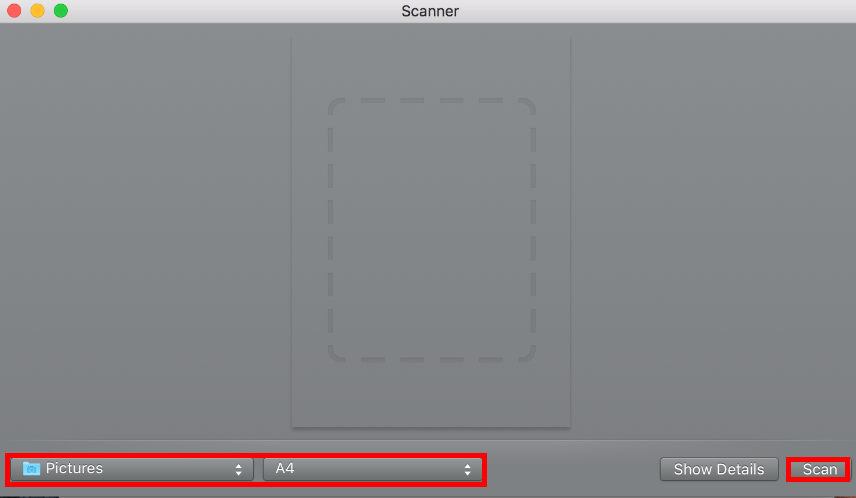
- Place the file that you would like to scan in the scanning area of the printer. In the Scanner window, set the save path (by clicking the folder icon in the lower left corner) and paper size, and click Scan.
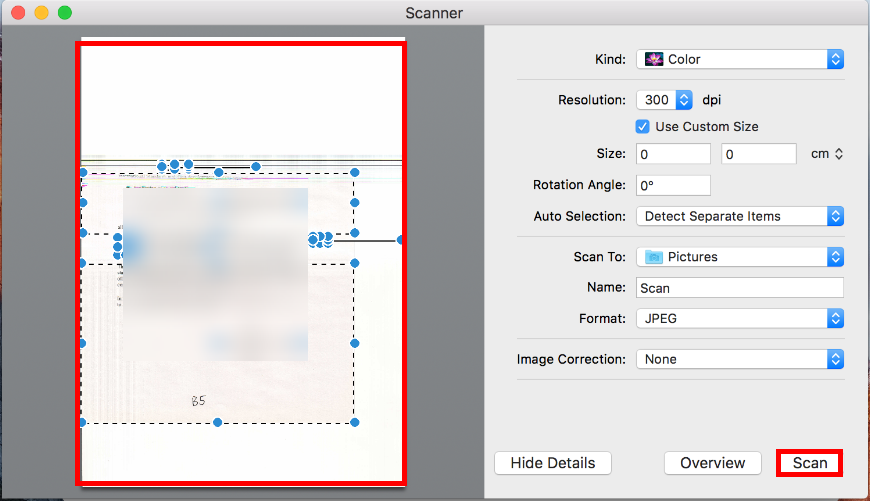
Additional scanning settings can be adjusted by clicking Show Details. For example, you can set the scanned file format to PDF. If you have clicked Show Details, an overview scan is automatically performed after the printer is started, and an image will be available for preview on the left. You can select the area you would like to scan and click Scan to scan only the specified area.
- After the scanning is complete, you can view the scanned files in the save path.
