Setting up a static IP address
| Setting up a static IP address |
By default, the printer automatically obtains an IP address. When connecting your computer to the printer using an IP address, you can set the printer's IP address as static in PC Manager or the Huawei Print client, in order to prevent the IP address from changing when the network connected to the printer restarts.
Mobile phones and macOS computers do not support setting static IP addresses for printers.
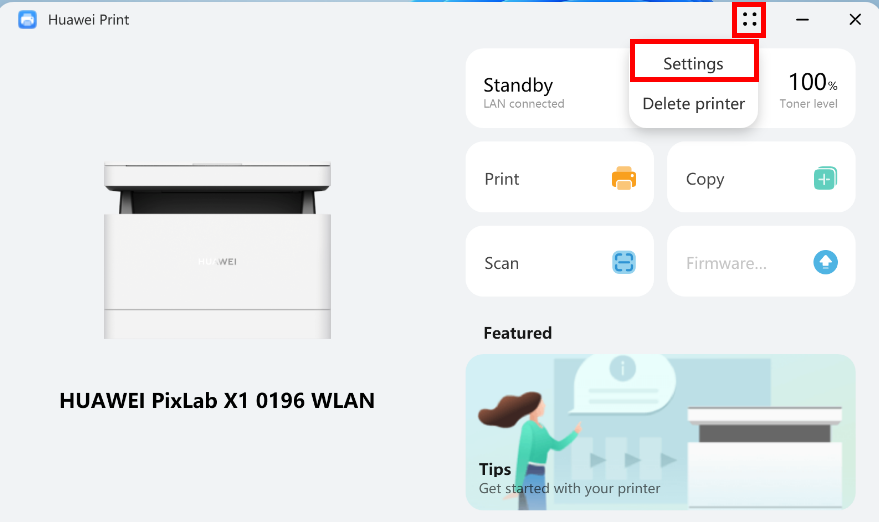
- Open the printer homepage in HUAWEI PC Manager, or open the Huawei Print client, then click the More icon in the upper right corner, and select Settings.

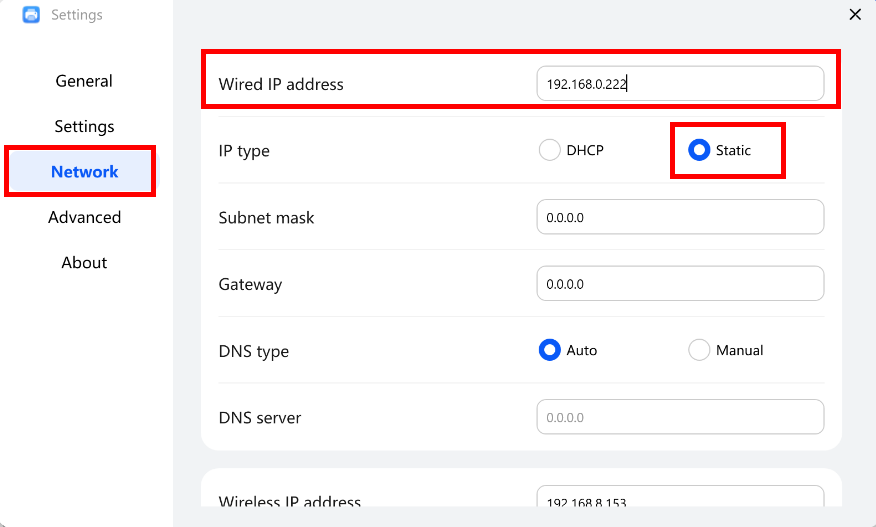
- Go to Network, and enter the IP address to be set in Wireless IP address, or Wired IP address. (You are advised to enter the IP address that is automatically obtained, which is within the network segment of the router. Otherwise, the entered IP address cannot take effect.) Set IP type to Static, click SAVE. A message will be displayed, indicating that the IP address setting change has taken effect.


- Press the Power button of the printer to power off the printer. After about one minute, restart the printer, in order for the network settings to take effect.
If the static IP address you set is different from the IP address that was previously obtained, reconnect your computer to the printer over LAN after restarting the printer.
- HUAWEI PC Manager: Go to My devices > ADD DEVICE > ADD MANUALLY and select the printer category. The computer will automatically search for printers on the LAN. From the results, select the printer you require, and follow the onscreen instructions to complete the connection.

- Huawei Print client: click ADD PRINTER > Over LAN. From the results, select the printer you would like to connect, and follow the onscreen instructions to complete the connection.

- HUAWEI PC Manager: Go to My devices > ADD DEVICE > ADD MANUALLY and select the printer category. The computer will automatically search for printers on the LAN. From the results, select the printer you require, and follow the onscreen instructions to complete the connection.
