Enabling a PXE device and using it for booting
| Enabling a PXE device and using it for booting |
Preboot eXecution Environment (PXE) provides a mechanism for starting a computer through network interfaces. Once a PXE device is enabled in the BIOS of the computer, PXE can be used to boot the system.
Enabling a PXE device:
- During startup, press and hold or continuously press F2 to enter the BIOS Setup Utility screen.
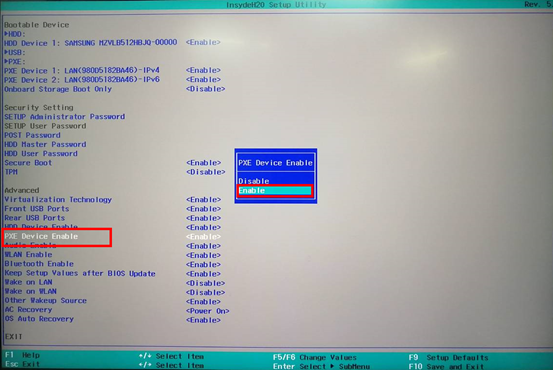
- Select PXE Device Enable, press Enter, and select Enable from the displayed dialog box. Press Enter to confirm your selection, and press F10 to save the settings and exit.
To disable the PXE device, click PXE Device Enable, press Enter, and select Disable from the displayed dialog box.

Using the PXE device for booting:
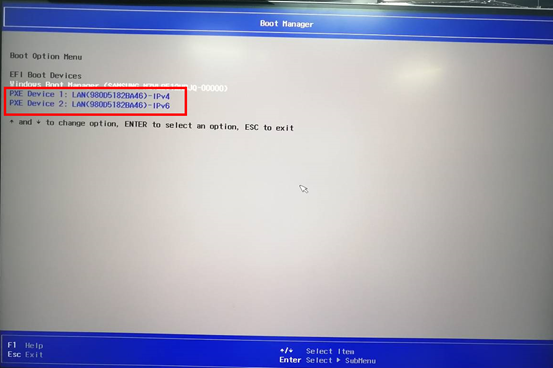
- After the PXE device is enabled in the BIOS, restart the computer. During startup, press and hold or continuously press F12 to open the boot management menu.
- Select the required PXE device and press Enter.
- In general, laptops include include a built-in wireless network adapter, but do not include an onboard network adapter. You'll need to connect an extended network adapter to the laptop to display PXE device options for booting.
- If you need to use PXE to install the system image, you'll need to configure the PXE-related services on the server and connect the server to the local computer. For details, contact the server's vendor.

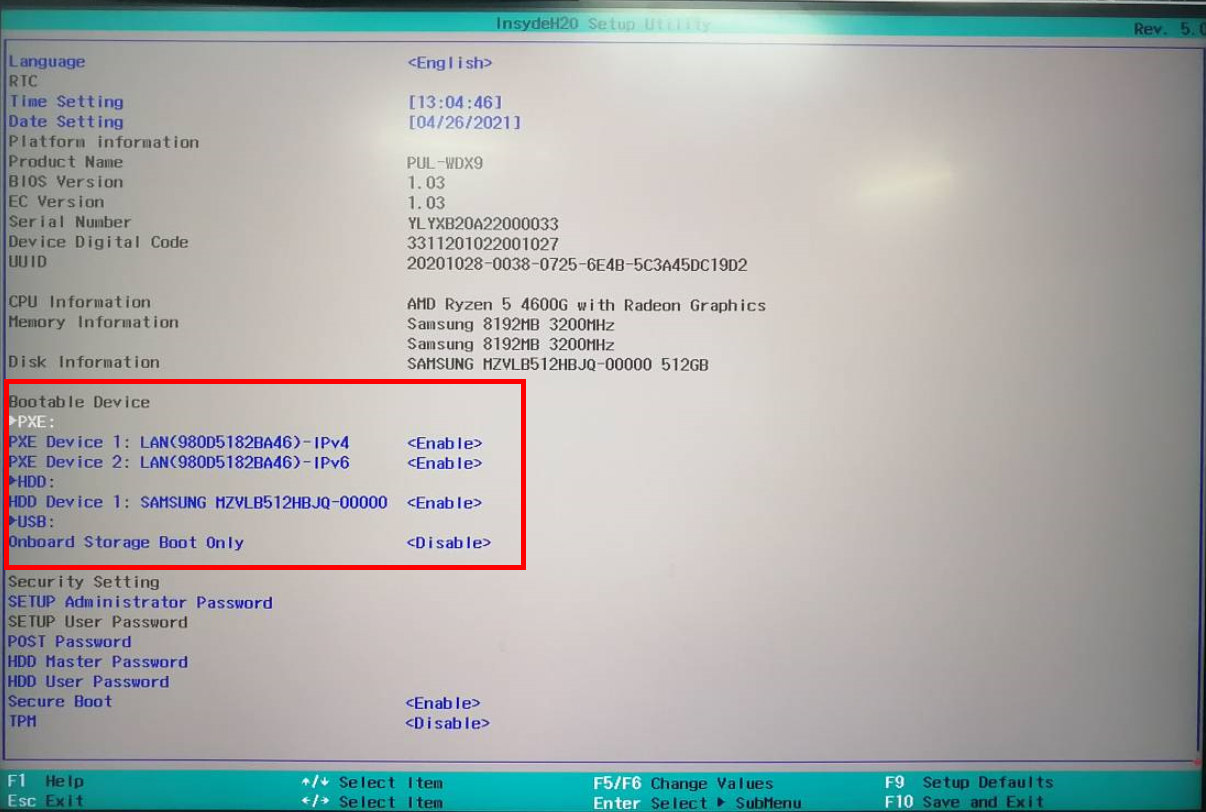
- If you wish to use PXE as the default boot device each time you start the computer, enter the BIOS Setup Utility screen and set a PXE device as the default boot device. To do this, press and hold or continuously press F2 during startup to enter the BIOS Setup Utility screen, select PXE under Bootable Device, and press F5/F6 to move PXE to the top.

